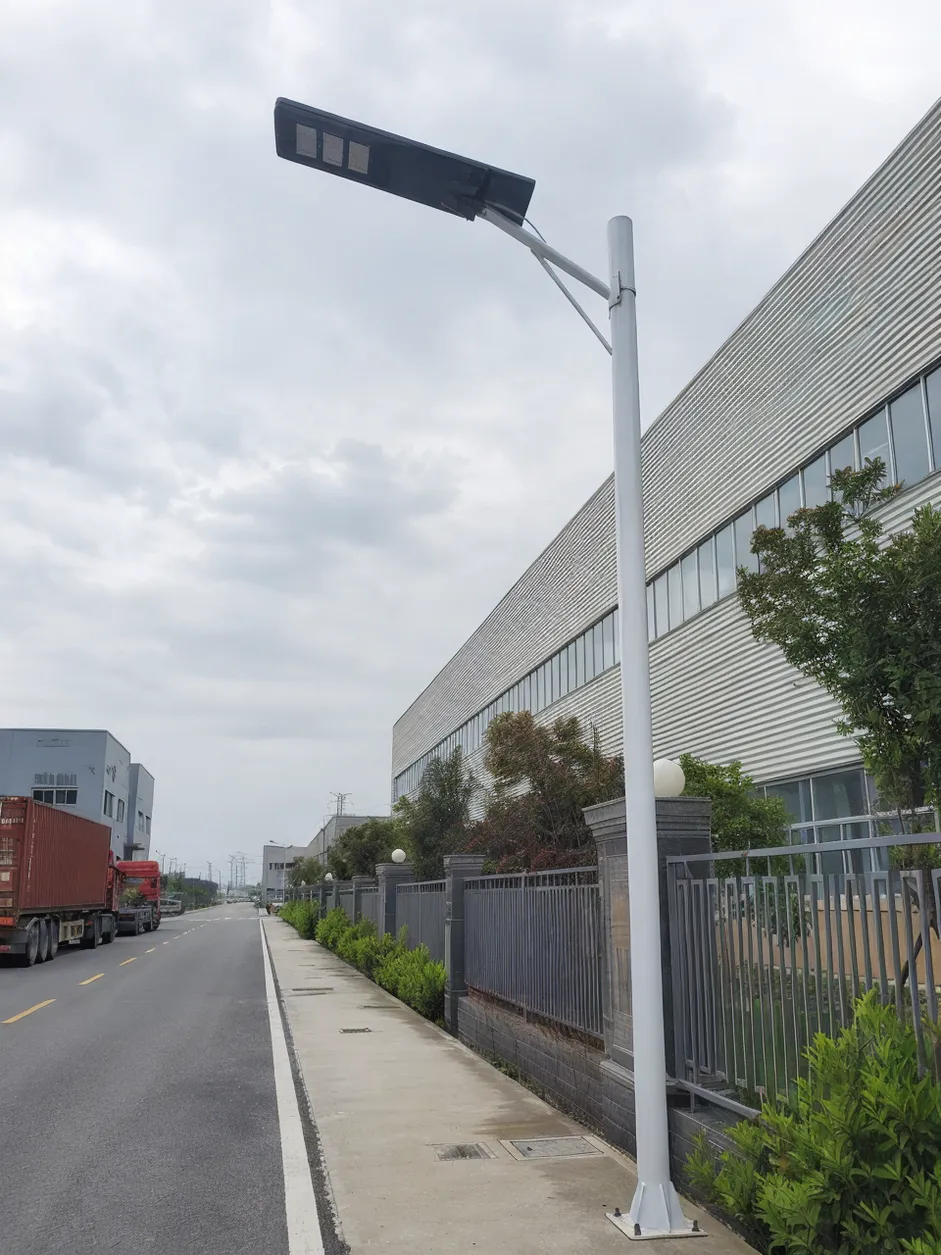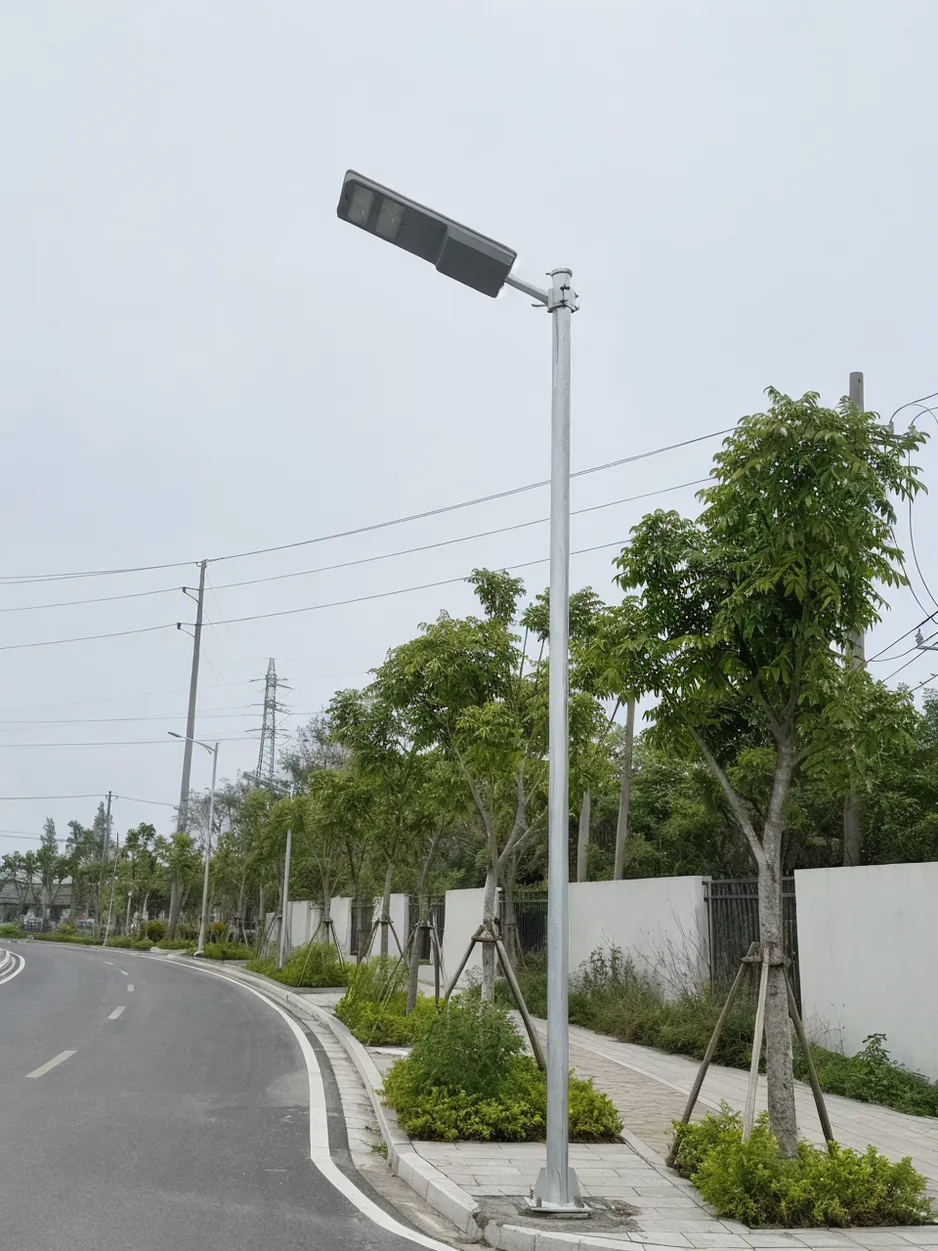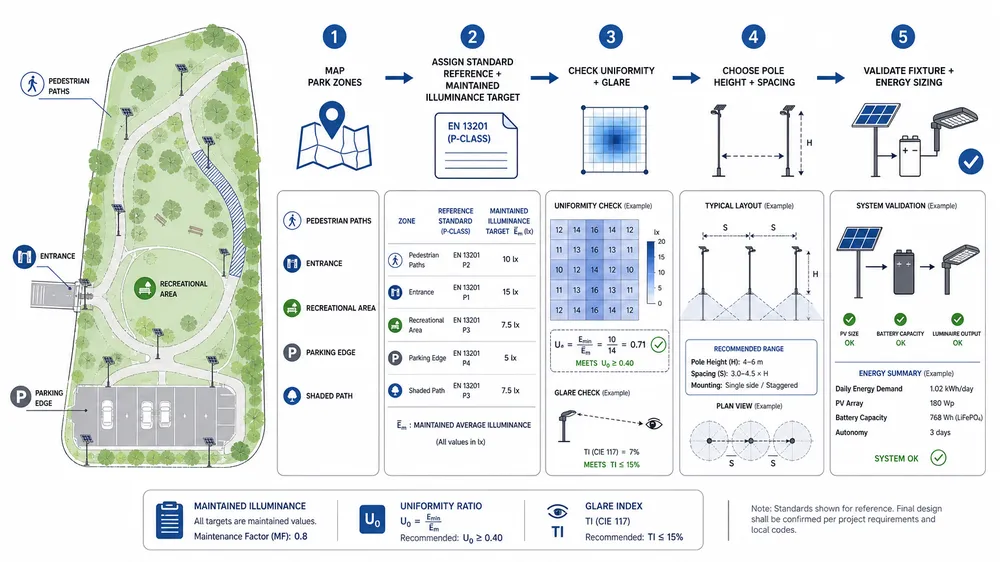
A park project gets quoted with a "high lumen" outdoor solar park lighting model, a 5-day autonomy claim, and an IP rating. The site has shaded pedestrian paths, a recreational area, entrance zones, and a parking edge — but the RFQ doesn't separate the zones. The supplier sizes the battery from a catalog runtime claim, not from the maintained illuminance target or local winter sun hours. First low-sun season: some paths fall below the required light level. Other areas were over-specified and paid for battery capacity that was never needed.
That failure pattern is common. The root cause is almost always the same: the safety compliance target and the solar power system were specified separately, or not specified at all.
This guide connects them. The workflow runs from park zone classification through maintained lux targets, pole layout, fixture output, battery autonomy, and winter panel recovery. Each step feeds the next. Skip one and the design either fails in the field or costs more than it should.
Start with maintained illuminance, not catalog wattage
The first number in any solar park lighting design should be a maintained illuminance target — not a wattage, not a lumen claim, and not a "brightness level."
Maintained illuminance is the minimum average horizontal lux the installation must deliver at the end of its maintenance cycle, accounting for lamp depreciation, dirt accumulation, and surface reflectance. Initial brightness claims from a catalog tell you nothing about what the fixture delivers at pole height, across a real surface, after 12 months of outdoor exposure.
Two reference frameworks cover most project markets. EN 13201 (the European road lighting standard family) defines lighting classes with maintained illuminance, uniformity, and glare thresholds by road and pedestrian zone type. ANSI/IES RP-8 covers roadway and parking facility lighting for North American projects. Both frameworks classify zones by pedestrian conflict level, traffic type, and safety risk — not by fixture wattage. Your local authority or project specification may reference one of these, a national adaptation, or a separate municipal standard. Whatever the reference, the maintained lux target and uniformity ratio are the design inputs. Wattage is a result.
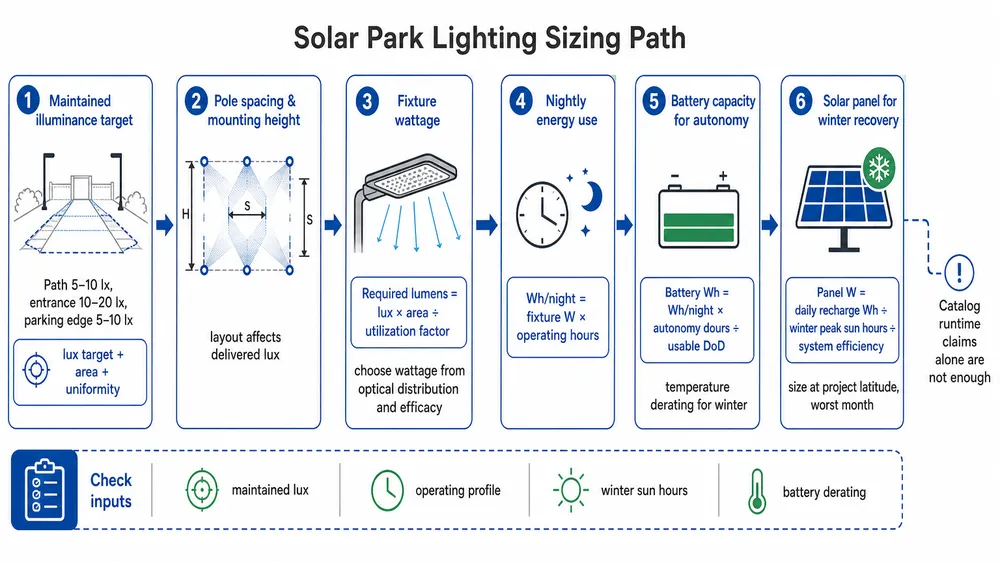
The design chain runs in one direction: zone classification → maintained lux and uniformity target → pole height and spacing → fixture lumen output and optics → nightly watt-hour load → battery autonomy → solar panel recovery. Reversing that chain — starting from a catalog fixture and working backward — is how projects end up with dark zones or oversized batteries.
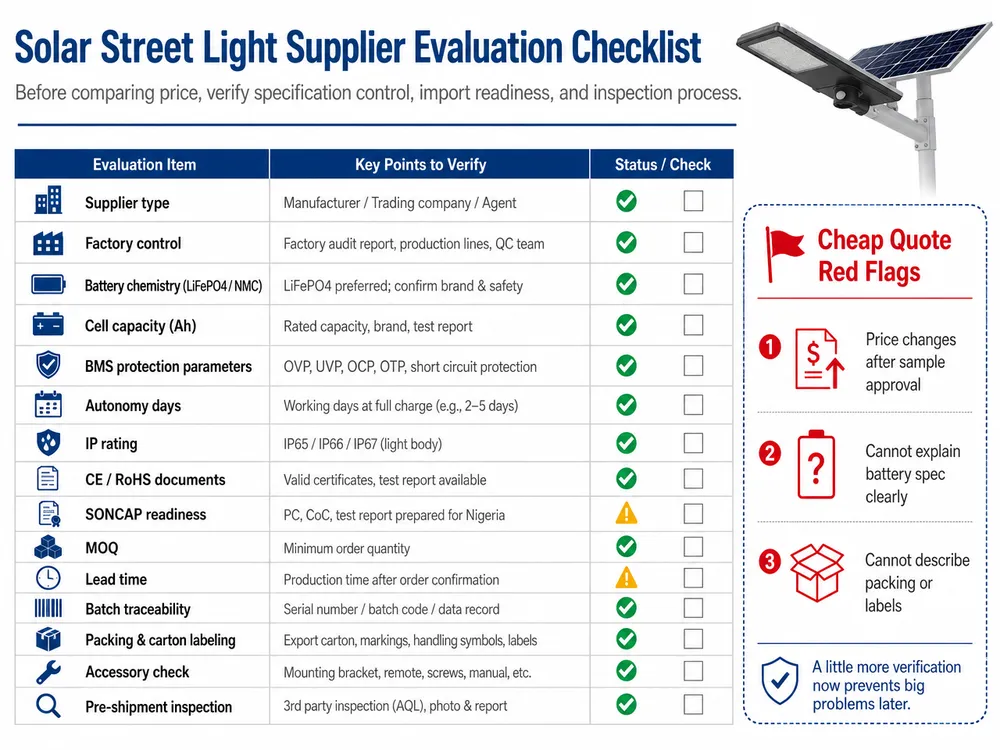
Red flag: A supplier quotes wattage and battery size before asking for zone type, pole height, runtime, or project location.
Red flag: "High brightness" appears in the spec sheet where a maintained lux value should be.
Classify park zones before selecting fixtures
One park can need three or four different lighting classes. A pedestrian path through a low-traffic landscape edge has a different safety requirement than an entrance plaza or a parking edge with vehicle conflict. Applying the same fixture and spacing across every zone is one of the most reliable ways to either fail a compliance check or waste budget on over-specified areas.
The table below is a planning reference. Exact maintained illuminance values depend on your project jurisdiction, the applicable standard version, and the local authority's classification of each zone. Verify against the current standard document before finalizing.
| Park zone | Design reference family | Maintained illuminance (planning example) | Uniformity concern | Typical pole height | Buyer risk if underspecified |
|---|---|---|---|---|---|
| Main entrance / plaza | EN 13201 P-class or IES RP-8 | 15–20 lux (example) | High — pedestrian conflict | 5–6 m | Project rejection, safety liability |
| Primary pedestrian paths | EN 13201 P-class | 10–15 lux (example) | Medium — path edge uniformity | 4–5 m | Dark zones, warranty claims |
| Recreational / activity areas | EN 13201 or local standard | 20–30 lux (example) | High — activity zone | 6–8 m | Safety non-compliance |
| Seating / plaza edges | EN 13201 P-class | 5–10 lux (example) | Low–medium | 4–5 m | Acceptable risk if path is lit |
| Parking edge / service road | IES RP-8 or EN 13201 ME-class | 5–10 lux (example) | Medium — vehicle conflict | 6–8 m | Accident liability, project rejection |
| Low-risk landscape edges | EN 13201 P-class low | 2–5 lux (example) | Low | 3–4 m | Minimal — over-spec wastes budget |
Zone inputs that affect the classification: pathway width, tree canopy density, vandalism exposure, operating schedule (dusk-to-dawn vs. partial night), and whether the zone has vehicle conflict. A shaded path under dense canopy may need a higher lumen fixture at the same pole height to hit the same maintained lux target — the canopy reduces effective panel charging hours and increases the optical challenge simultaneously.
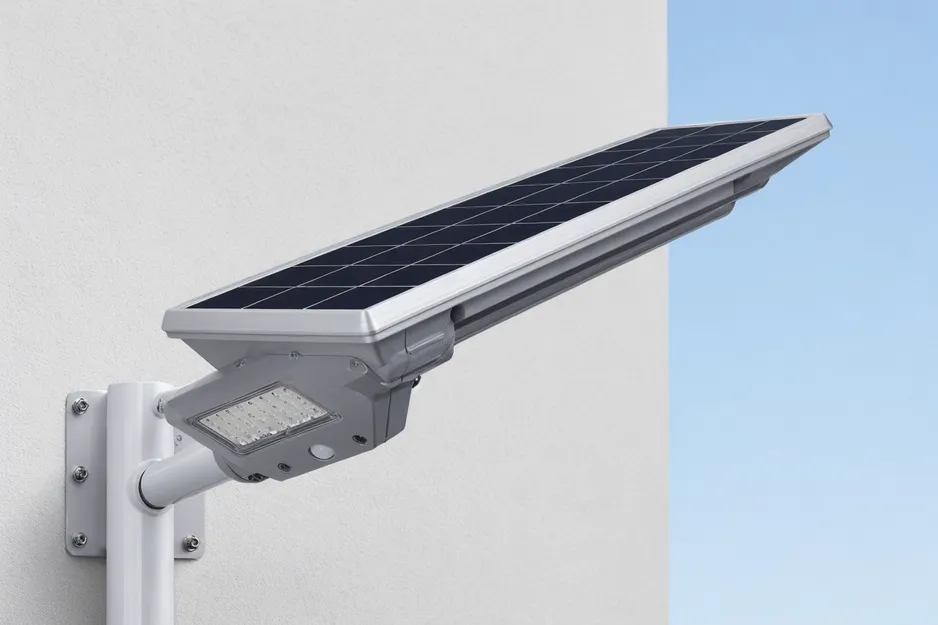
When the zone map is complete, fixture selection follows naturally. Solar Park Lighting for project-grade outdoor solar park lighting fixtures sized by zone and latitude.
Checkpoint: Confirm that paths, entrances, and activity zones are separated on the site plan before any fixture is selected.
Red flag: The same fixture spacing is applied across every park zone.

Convert the lux target into pole spacing, optics, and fixture output
Lumen output is not a number you choose from a catalog. It is a result of layout geometry, optics, mounting height, and surface conditions. Two fixtures with identical lumen ratings can deliver very different maintained lux values depending on beam angle, optical distribution, pole spacing, and the maintenance factor applied.
The variables that determine delivered lux at ground level:
- Mounting height: Higher poles spread light over a larger area, reducing lux per square meter. A 6 m pole covering a 15 m spacing needs significantly more lumen output than a 4 m pole at 12 m spacing to hit the same maintained lux.
- Pole spacing: Wider spacing creates deeper dark zones between poles. Uniformity ratio (minimum lux / average lux) degrades faster than average lux as spacing increases.
- Beam angle and optical distribution: A wide flood distribution works for open plazas. A narrow asymmetric distribution is more efficient for linear paths. Using a flood optic on a narrow path wastes light to the sides and may create glare without improving path uniformity.
- Maintenance factor: Typically 0.7–0.8 for outdoor LED solar fixtures, accounting for LED lumen depreciation and dirt accumulation over the maintenance cycle. A supplier who quotes initial lumens without applying a maintenance factor is overstating delivered performance.
- Surface reflectance: Concrete paths (reflectance ~0.3) return more light than dark asphalt (~0.05–0.10). The same fixture delivers measurably different maintained lux on different surfaces.
Planning example (label: example only — verify with photometric data for your project):
A pedestrian path, 3 m wide, 4 m pole height, 15 m pole spacing, single-sided layout, concrete surface, maintenance factor 0.75. Target: 10 lux maintained average. Working backward through a simplified lumen utilization estimate, the fixture needs to deliver roughly 2,000–2,500 lm at the pole (after applying the maintenance factor and accounting for the utilization coefficient of the optic). A fixture rated at 3,000 initial lumens with a narrow asymmetric optic may hit this target. A 3,000 lm fixture with a wide flood optic may not — the light spills outside the path and the maintained lux on the path surface falls short.
This is why photometric files matter more than lumen claims. IES or LDT files from the manufacturer let you run the layout in DIALux or AGi32 and confirm maintained lux and uniformity before ordering. The software validates the layout; it does not replace correct product data. If the photometric file doesn't match the actual fixture, the simulation is wrong.
(We've seen projects where the buyer ran a DIALux simulation with a generic photometric file from a different product. The layout looked compliant on screen. The installed fixtures used a different optic and the path edges were 30% below target. The photometric file has to match the exact product being ordered.)
Checkpoint: Request the photometric file (IES or LDT format) for the specific fixture model, not a generic file for the product family.
Checkpoint: Check uniformity along path edges and between poles, not only average lux.
Red flag: The quote provides total lumens but no beam angle, pole height, or spacing assumption.
Size the battery from nightly watt-hours, not backup claims
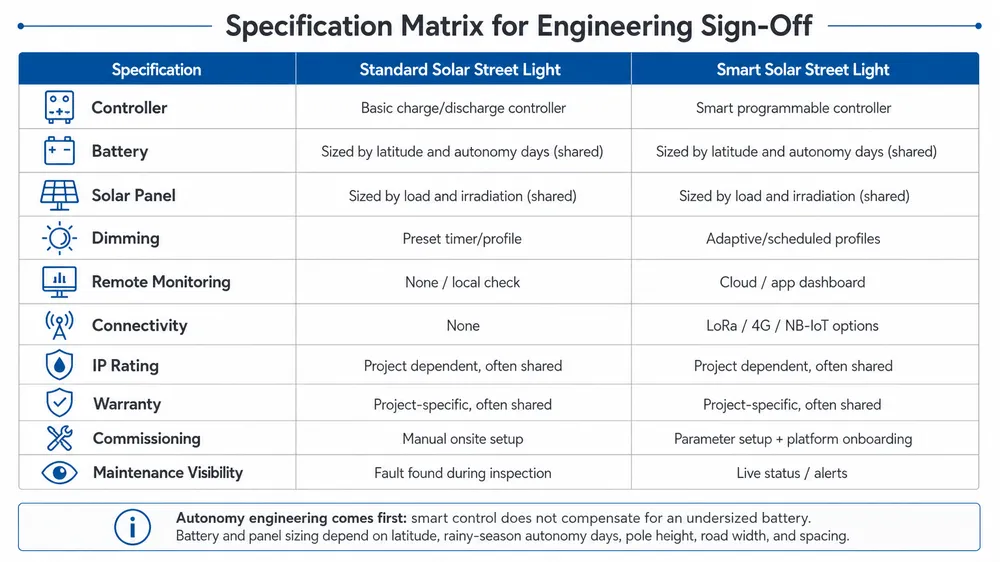
Battery autonomy is the most commercially consequential number in a solar park lighting specification. Get it wrong in either direction and the project either fails in winter or costs 30–40% more than it needs to.
The sizing chain is straightforward:
Step 1 — Nightly watt-hour load:
Nightly Wh = Fixture watts × Operating hours × Dimming profile factorA 30 W fixture running 10 hours at full output = 300 Wh/night. If the dimming schedule runs full output for 4 hours, then 50% output for 6 hours, the actual nightly load is (30 × 4) + (15 × 6) = 210 Wh/night. The dimming schedule matters more than the "12 hours lighting" claim on the spec sheet.
Step 2 — Autonomy watt-hours:
Autonomy Wh = Nightly Wh × Required autonomy days3 autonomy days at 210 Wh/night = 630 Wh of usable energy needed.
Step 3 — Battery pack capacity:
Battery Wh = Autonomy Wh ÷ (Usable DoD × Controller efficiency × Temperature margin)For a LiFePO4 pack with 80% usable depth of discharge, 95% controller efficiency, and a 10% winter temperature margin: 630 ÷ (0.80 × 0.95 × 0.90) = approximately 920 Wh nominal battery capacity.
On autonomy day targets:
3 autonomy days is a common engineering starting point for mid-latitude projects with moderate rainy seasons and reasonable panel recovery. It is not a universal rule.
5 autonomy days is justified when: the site is at high latitude with long cloudy winters, the zone is a critical safety area (main entrance, parking with vehicle conflict), maintenance access is difficult, or the rainy season consistently runs 4–5 consecutive overcast days. Outside those conditions, specifying 5 autonomy days in a region with 4 peak sun hours in winter adds 30–40% to battery cost without improving actual reliability — because the panel cannot recover the extra stored energy fast enough to make the additional capacity useful.
The first-year solar lighting failures I've seen most often trace back to autonomy that was sized for a generic "5 rainy days" claim rather than the actual nightly load and local winter sun hours. The battery was either too small for the real load or too large for the panel to recover, and the system ran into a deficit by week three of a cloudy stretch.
Battery chemistry also matters. LiFePO4 handles deep discharge cycles and low-temperature operation better than older lithium chemistries. Usable capacity at 0°C can drop 15–20% compared to 25°C for some chemistries — that margin needs to be in the calculation, not discovered in the field.
Checkpoint: Confirm whether the quoted autonomy is based on full output or the actual dimming schedule.
Checkpoint: Ask for battery chemistry, nominal capacity (Wh), usable depth of discharge, and the temperature assumption used in sizing.
Red flag: "5 rainy days" is quoted with no nightly load calculation and no dimming schedule.
Red flag: Battery capacity is listed in Ah without specifying voltage — Ah alone is not a usable spec.
For a deeper look at autonomy day calculations for solar street and park applications, see solar street light autonomy days.
Size the solar panel for winter recovery at the project latitude
Battery autonomy and panel recovery are two separate problems. A larger battery delays failure during a cloudy stretch. A correctly sized panel prevents the deficit from accumulating in the first place. Specifying one without the other is incomplete.
The panel sizing formula:
Panel Wp = (Nightly Wh × Recovery margin) ÷ (Winter PSH × System efficiency)Where:
- Winter PSH = peak sun hours at the project latitude during the worst solar month (not annual average)
- System efficiency = panel-to-battery efficiency, typically 0.75–0.85 after accounting for controller loss, wiring loss, and temperature derating
- Recovery margin = 1.1–1.2 to ensure the panel recovers the nightly load plus a buffer
Why winter PSH, not annual average:
Annual average peak sun hours look acceptable for most locations. Winter PSH tells you whether the panel can actually recover the nightly load during the months when the battery is under the most stress. A site in Northern Europe (latitude ~52°N) may have an annual average of 3.8 PSH but a December PSH of 1.2–1.5. A site in the Middle East (latitude ~25°N) may have a December PSH of 5.0–5.5. Sizing the panel from the annual average for the Northern Europe site produces a system that runs into a deficit every winter.
Comparison example (planning reference only):
| Parameter | Middle East site (25°N) | Northern Europe site (52°N) |
|---|---|---|
| Nightly load | 210 Wh | 210 Wh |
| Winter PSH | 5.2 | 1.4 |
| System efficiency | 0.80 | 0.80 |
| Recovery margin | 1.15 | 1.15 |
| Required panel Wp | ~58 Wp | ~216 Wp |
The same fixture, same battery, same nightly load — but the panel requirement is nearly 4× higher for the Northern Europe site. A supplier quoting the same panel wattage for both regions is not sizing for winter recovery.
Additional park-site variables that reduce effective panel output:
- Tree canopy and shade: Winter sun angles are lower, so canopy that doesn't shade the panel in summer may shade it significantly in December. Check the winter sun angle for the project latitude.
- Snow cover: Panels mounted at low tilt angles accumulate snow. A tilt of 15° or more helps self-clearing in most climates.
- Dirt accumulation: Dust and bird droppings reduce output by 5–15% in dry climates. The recovery margin should account for this.
- Panel tilt: Panels tilted toward the latitude angle recover more energy in winter than flat-mounted panels. For park fixtures, the bracket tilt is often fixed — confirm it matches the project latitude range.
A larger battery without enough panel recovery only delays the failure. We've shipped systems to buyers who added battery capacity after a first-winter failure without checking panel recovery. The second winter was marginally better. The third was the same problem. The fix was panel wattage and tilt, not more battery.
JXSOL's engineering review sizes battery and panel capacity by buyer latitude, autonomy target, runtime, and zone requirement — not from a generic calculator. That review is part of the order process for project quantities.
Checkpoint: Confirm the winter PSH value for the project city or latitude before accepting a panel spec.
Checkpoint: Check whether tree canopy or nearby structures shade the panel during winter sun angles (typically 15–30° above horizon for mid-to-high latitudes).
Red flag: The same panel wattage is quoted for a Middle East project and a Northern European project with the same fixture and battery.
Specifications that keep the paper design alive outdoors
A correct design on paper fails in the field when the product specification doesn't lock the variables that matter. These are the fields that should be frozen before production:
Photometric and electrical:
- Lumen output (maintained, not initial) and the maintenance factor used
- Wattage at full output and at each dimming level
- CCT — 4000K is a common park planning reference, but check local dark-sky ordinances, wildlife corridor requirements, or municipal CCT restrictions before specifying
- Beam angle and optical distribution type (asymmetric path, wide flood, etc.)
- Photometric file format (IES or LDT) and the specific model it applies to
Mechanical and environmental:
- Pole height, bracket type, and mounting configuration
- IP rating — IP65 minimum for exposed outdoor solar park lighting; IP67 for fixtures in flood-prone or high-humidity zones. IP rating does not prove photometric compliance; it only addresses ingress protection.
- Operating temperature range — confirm the battery chemistry and controller are rated for the project's winter low temperature
- Housing material and surface treatment (die-cast aluminum with powder coat is standard for park-grade fixtures)
Energy system:
- Battery capacity (Wh nominal), chemistry, usable depth of discharge, and cycle life rating
- Solar panel wattage (Wp), cell type, and tilt angle
- Controller type (MPPT preferred over PWM for efficiency), dimming schedule, and low-voltage protection threshold
Certifications and documentation:
- CE, RoHS for European markets; IEC 62124 for photovoltaic lighting performance support
- IP65/IP67 test reports, not just markings
- Battery test reports (charge/discharge cycling, temperature performance)
- Order-level documentation — certifications listed on a website are not the same as test reports available per order
JXSOL's production covers CE, RoHS, IP65/IP67, and IEC 62124 documentation for export markets. Our in-house battery and LED testing lab runs charge/discharge cycling and lumen confirmation on every production batch. Automated SMT lines and 100% pre-shipment inspection mean the spec on paper matches the unit in the field. For project-grade outdoor solar lighting across street, roadway, and park applications, see Solar Street & Roadway Lights Manufacturer.
Checkpoint: Confirm that the approved sample and bulk production order use the same battery pack, LED module, controller firmware, and panel — not equivalent substitutes.
Red flag: IP54 or vague "waterproof" claims for exposed park environments.
Red flag: Certifications are listed on the product page but not available as order-level test documentation.
Design mistakes that raise project cost or cause winter failure
These six mistakes account for most of the solar park lighting failures and cost overruns we see at the engineering review stage.
Mistake 1: Using initial lumens instead of maintained lux and uniformity. Initial lumen claims don't account for LED depreciation, dirt, or the optical efficiency of the fixture at the actual mounting height. A fixture that claims 5,000 lm may deliver 8 lux maintained on a 4 m path — or 14 lux, depending on optics and spacing. The lumen number alone tells you nothing. Commercial outcome: dark zones, compliance failure, site revisit cost.
Mistake 2: Ignoring pole spacing and optics, then trying to fix dark zones with higher wattage. Adding wattage to a fixture with the wrong optic or wrong spacing doesn't fix uniformity — it raises the average lux while the dark zones between poles remain. The fix is layout geometry and optic selection, not wattage. Commercial outcome: higher fixture cost, higher nightly energy load, larger battery required, no compliance improvement.
Mistake 3: Using annual sun-hour averages instead of winter peak sun hours. Annual averages look acceptable for most locations. Winter PSH is where the system actually gets stressed. A panel sized on annual average for a 52°N site will run a deficit from November through February. Commercial outcome: battery depletion, reduced runtime, warranty claims, project rejection at seasonal inspection.
Mistake 4: Specifying 5 autonomy days as a default without checking risk level, dimming schedule, and panel recovery. 5 autonomy days in a 4 PSH winter region with a 30 W fixture running 10 hours adds roughly 40% to battery cost compared to a correctly sized 3-day spec. If the panel can't recover the load in 3–4 days of normal winter sun, the extra battery capacity just delays the same deficit. Commercial outcome: 30–40% battery cost premium with no reliability improvement.
Mistake 5: Raising panel wattage late without checking bracket, pole, or mounting constraints. A larger panel is heavier and has higher wind load. Changing panel wattage after the pole and bracket are specified may require a structural review. Park poles are often slimmer than roadway poles. Commercial outcome: redesign cost, production delay, potential structural non-compliance.
Mistake 6: Accepting a runtime claim without battery pack matching, charge/discharge testing, and aging verification. A battery rated at 100 Ah may deliver 70 Ah usable at 0°C after 200 cycles. Runtime claims based on new-battery performance at 25°C don't reflect field conditions in year two or three. Commercial outcome: early battery replacement, warranty exposure, distributor margin erosion.
(The cheapest quote almost always has the same claimed runtime with a smaller battery and panel. The math doesn't work — but it's not visible until the first winter.)
Red flag: The cheapest quote has the same claimed runtime but a smaller battery and panel than the next quote.
Red flag: The supplier cannot explain which autonomy day assumption, nightly load, and winter PSH support the battery capacity claim.
Red flag: Final drawings and BOM are not frozen before production starts.
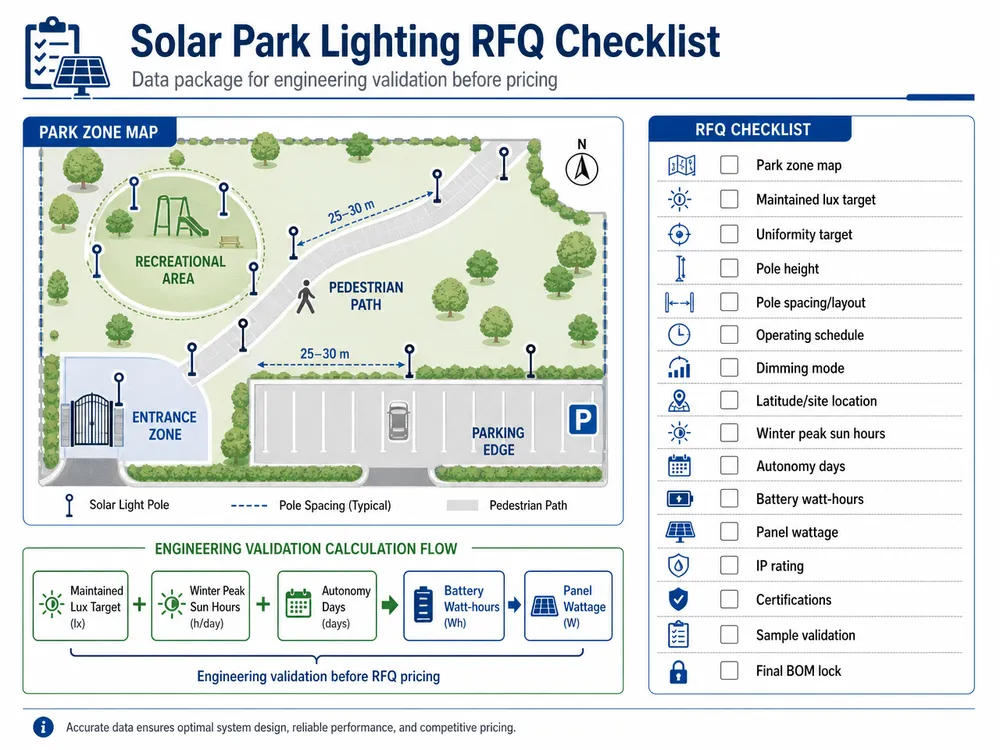
Data package for engineering validation before the RFQ is priced
A solar park lighting RFQ that contains only wattage, quantity, and "3–5 rainy days" cannot be priced on the same basis by different factories. The quotes will be incomparable, and the lowest price will almost certainly reflect the smallest battery and panel, not the best design.
The information needed for a valid engineering review:
Site and standard:
- Country, city, or latitude (for winter PSH lookup)
- Park zone map or site plan with zone labels
- Reference standard or local authority lighting requirement
- Maintained lux and uniformity targets by zone
Layout:
- Pole height, spacing, and mounting configuration per zone
- Tree canopy or shading obstacles
- Path width and surface type
Energy system inputs:
- Operating hours and dimming schedule (full output hours + dimmed hours + off hours)
- Winter peak sun hours or rainy-season pattern for the project location
- Autonomy day target and the risk level that justifies it
Product requirements:
- CCT, IP rating, and certification requirements
- Operating temperature range (winter low)
- OEM/ODM requirements, custom lumen or CCT options
Order structure:
- Quantity, sample validation plan, and target deployment timeline
- Whether a pre-production sample review is required before bulk production
MOQ from 100 units for standard models lets project buyers validate a configuration — fixture output, battery performance, controller behavior — before committing to full deployment. That sample validation step is where specification mismatches get caught, not in the field.
When you have this data package ready, Request Quote with the project inputs and our engineering team will review battery, panel, lumen output, and control logic before production is confirmed.
Checkpoint: Confirm that the RFQ contains enough data for all factories to quote the same specification basis.
Red flag: The buyer sends only wattage, quantity, and "3–5 rainy days" with no site location, zone targets, or dimming schedule.
Buyer questions that deserve short answers
What lux level should solar park lighting use?
There is no single answer. Lux targets depend on zone classification and the applicable standard for your project jurisdiction. As planning references: pedestrian paths commonly target 10–15 lux maintained; entrance plazas 15–20 lux; recreational activity areas 20–30 lux; low-risk landscape edges 2–5 lux. Verify against EN 13201, IES RP-8, or your local authority requirement before finalizing. Using a planning reference as a compliance value without checking the current standard is a project risk.
Is 3-day autonomy enough for outdoor solar park lighting in winter?
For mid-latitude sites with moderate rainy seasons and correctly sized panel recovery, 3 days is a reasonable engineering starting point. It is not enough for high-latitude winter sites, critical safety zones, or sites with difficult maintenance access. The autonomy target should follow from the nightly load calculation, the winter PSH, and the zone risk level — not from a default number on a spec sheet.
Can the same solar park light specification work in the Middle East and Northern Europe?
The fixture and battery may be the same. The panel wattage almost certainly cannot be. A site at 25°N with 5.2 winter PSH needs roughly 4× less panel wattage than a site at 52°N with 1.4 winter PSH for the same nightly load. Quoting the same panel for both regions means one of them is wrong. This is the most common single-spec mistake we see on multi-region project orders.
Should I increase the battery or the solar panel first for winter reliability?
Check the panel recovery first. If the panel cannot recover the nightly load under winter PSH, adding battery capacity only delays the deficit — it doesn't prevent it. The correct sequence: confirm the panel Wp is sufficient for winter recovery, then size the battery for the autonomy days the risk level requires. If both are undersized, fix the panel first.
Do IP65, IP67, CE, or IEC 62124 prove that a park lighting design meets solar park lighting standards?
No. IP65/IP67 confirms ingress protection against dust and water. CE marks electrical safety and EMC compliance for the European market. IEC 62124 covers photovoltaic lighting system performance testing. None of these certifications confirm that the fixture delivers the maintained lux and uniformity required by EN 13201, IES RP-8, or your local park lighting standard. Compliance with a lighting standard requires a photometric layout review against the maintained illuminance and uniformity targets for each zone. Certifications reduce product risk; they do not replace the lighting design step.